Science, technology, engineering, and math (STEM) are hot topics and areas of focus in the education community. No matter what grade you teach, expect there to be a strong emphasis on these subjects throughout the school year. In the midst of pursuing these high academic goals, it is important to remember that learning should be fun. Science should be a subject that makes students wonder, question, and get excited about. One way to do that is with hands-on learning. Sidney McKay, a teacher in Canada, shares with us one way that she transforms her science lessons into learning experiences that her students will never forget.
Making Science Fun: How to Make a Prism
By Sidney McKay, Guest Blogger
What do you remember about elementary science classes? When I was growing up, what I remember most was reading about science in a textbook. Sometimes the teacher would do a demonstration at the front of the class, but usually we just read about experiments and then answered questions from the text.
When I became a classroom teacher, I realized the how powerful it was to do “hands-on” science with my students. The students were excited, engaged and motivated. I discovered that I could get even the most reluctant student to participate, as long as it involved doing something kinesthetic. It would seem I am not alone in my observations, a recent study at Queen’s University states “Students using the old-fashioned style of hands-on activities in science class do better than students who are taught using the current trend of asking questions to learn for themselves.” (John Freeman and Don Klinger, “Social Psychology of Education”, December 2010.)
For many years, I was fortunate to have the opportunity to work outside my classroom as an elementary science and technology consultant. One of the things I loved about that role was the opportunity to go into classrooms and conduct hands-on science investigations with both teachers and students. The following investigation remains one of my all-time favorites. I was asked time and time again to come and create these hands on “optical devices” with students.
Making a Prism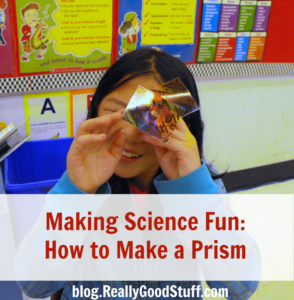
Materials:
- Utility Knife (for teacher use only)
- Scissors (for teacher use only)
- Masking Tape
- Clear tape
- Permanent Markers in a variety of colors
- Overhead transparency, 5 x 5 cm squares (2 per student)
- Straight Pin
- 35mm Film Canister, black ( 2 per student)
- 3 Plastic Microscope slides (3 per student)
- Electrical tape (optional)
Directions:
- This step is for Teacher use ONLY: Using the sharp end of a pair of scissors or the head of a screwdriver, carefully punch a ¼” diameter hole in the bottom of the first canister.
- Using a utility knife, carefully cut around the end of the second canister and remove the bottom. I do this as if I am a “can opener” and I hold the canister in my hand and turn IT, not the knife!
- Give each student three plastic microscope slides and ask them to create a triangular prism. Use clear tape to attach the sides together. (Optional) To make the prism even more “mirror like” you can wrap the outside of the prism with black electrical tape. It’s fun to try it both ways and see if the students notice a difference.
- Next have the students tape both canisters together with tape and then slide the prism into the resulting cylinder.
- Students use permanent markers to decorate the clear transparency. Remind students to be sure all the clear spaces are filled with color. Have students create interesting patterns on the transparency using black, fine line permanent markers. For example you can ask students to draw shapes with the black marker and make the transparency look like stained glass.
- Poke the pin through the side or center of the decorated transparency and tape the pin to the top of the second canister.
- Finally the excited students get to look through the eye piece and rotate the transparency pieces with their fingers. They will see an explosion of color as the colors overlap.
It’s a science experiment and lesson that your students will remember for years to come!
About the Author
Ms.McKay has been a passionate, elementary teacher for 22 years. She currently teaches in a gifted intensive support program in Toronto. She holds elementary specialist qualifications in Science as well as Special Education. Ms.McKay is a winner of the Prime Minister’s Award for Excellence in Teaching Math, Science and Technology and was nominated for the Premier’s Award for Teaching Excellence. She has worked as an Instructional Leader in Science and Technology, a course instructor for Science in Primary and Junior AQ’s and is a contributing author for a popular hands-on science series of teaching manuals. You can read more about her classroom on her blog at http://teachingisagift.blogspot.ca.